Blog

Filter by Tags
Filter by Teams
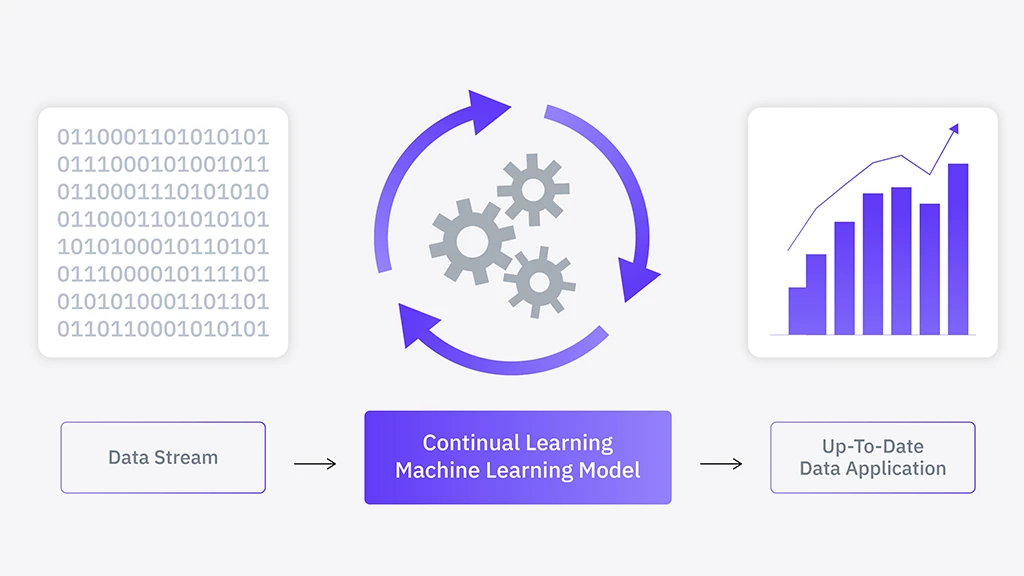
Continual learning from data stream to insight
Tech2024.09.02

Continuous Model Performance Improvement through Active Learning

To implement reliable autonomous driving technology, it's essential to accurately reconstruct the 3D environment around the vehicle in real-time. At 42dot, we are advancing autonomous driving technology by continuously collecting data and tracking model performance to develop high-performance 3D perception models that operate in real-time. 1. The Problem of Duplicate Predictions in Object Detection Models and Its Impact Autonomous vehicles reconstruct their surrounding environment to identify the location of obstacles, predict the movement of other vehicles and pedestrians, and plan a safe driving route. Therefore, the accuracy of the 3D object detection model, which is the first step in the autonomous driving system, significantly affects the vehicle's operation. At 42dot, we continuously collect data to evaluate and improve our models. When evaluating the model with recently added data, we found that in cases where 4-5 pedestrians were gathered in a small area, more duplicate predictions occurred than the actual number of pedestrians. These duplicate predictions can ca1use the autonomous vehicle to recognize non-existent objects, potentially leading to abnormal movements. While we can reduce false detections by increasing the prediction score threshold in the post-processing stage, this may increase the number of undetected pedestrians, posing a safety risk. When the score of predicted pedestrians is low, the probability of the detected object being a duplicate prediction increases. 2. Active Learning Pipeline To improve the model's weaknesses, 42dot operates an Active Learning Pipeline that continuously collects data from similar cases and includes it in network training. To efficiently incorporate newly collected data into model training with minimal human intervention, we use a high-performance model that operates offline. The knowledge learned from this high-performance model is then distilled into the real-time model operating in the vehicle, improving its performance. 3. Introduction of Transformer Model Structure Recent object detection models [1, 2] have significantly improved performance by introducing transformer structures. Transformers allow object queries to exchange information between objects through self-attention and utilize the entire information of the feature map, providing richer information than CNN structures. In particular, transformer-based object detection models use one-to-one matching between ground truth and predictions during training, which is highly effective in suppressing duplicate predictions. These characteristics of transformer models are expected to effectively solve the pedestrian duplicate prediction problem and greatly improve pedestrian detection performance. 4. Utilizing Denoising Techniques However, contrary to expectations, simply introducing a transformer-based object detection model did not result in significant performance improvements. To identify the cause of the problem, we analyzed the number of object queries per class in the model. In densely populated urban areas, we found that the number of object queries generated around pedestrians was very high, causing instability in the learning process when matching the generated object queries with ground truth. To solve this, we applied the Dense Distinct Query [3] technique introduced at CVPR 2023, which helped resolve the issue and secure learning stability. 5. Performance Improvement Results By introducing these various technologies, we have significantly reduced the number of pedestrian duplicate predictions while greatly improving the model's precision. Additionally, the prediction quality of pedestrian location, size, and direction of movement has been further improved. This enhanced high-performance model is applied to vehicles to improve driving performance. 42dot is committed to continuously developing and researching technology to make autonomous driving safer. Youngseok Kim, Juhan Cha (Intern) ⎢ AD Algorithm We are developing technology to help autonomous vehicles understand their surroundings faster and more accurately. Reference [1] Nicolas Carion et al., “ End-to-End Object Detection with Transformers ,” ECCV, 2020. [2] Xuyang Bai et al., “ TransFusion: Robust LiDAR-Camera Fusion for 3D Object Detection with Transformers ,” CVPR, 2022. [3] Shilong Zhang et al., “ Dense Distinct Query for End-to-End Object Detection ,” CVPR, 2023.
Multilingual chat bubbles surrounding LLM text
Tech2024.03.29

42dot LLM 1.3B

We have previously released our large language model (LLM), 42dot LLM. The released 1.3 billion parameter models were trained using our own carefully collected internal data and training infrastructure. 42dot LLM stands out as a Korean-English bilingual model, being the first of its kind to be accessible to the public in Korea. Our model demonstrates superior performance on various quantitative and qualitative benchmarks compared to other competitive models of similar size. The release comprised two types of LLMs: 42dot LLM-PLM, a Pre-trained Language Model, and 42dot LLM-SFT, a Supervised Fine-Tuned language model, which was fine-tuned from the PLM to better align with human usability. [Demo of 42dot LLM] https://huggingface.co/42dot/42dot_LLM-PLM-1.3B https://huggingface.co/42dot/42dot_LLM-SFT-1.3B 1. SFT Model Supervised Fine-Tuning is a technique that uses a small, carefully labeled dataset to adjust the weights and biases of a pre-trained model to make it more aligned for a specific task. Incorporating a diverse range of instruction-following data in the fine-tuning dataset can enhance the usability of a language model (LLM), making it more human-friendly for communication and interaction. Large language models that are aligned through this technique are termed SFTs, in order to differentiate from the models aligned using a different alignment technique called reinforcement learning with human feedback (RLHF). One of our released models, 42dot LLM-SFT was aligned in this way. And you can interact and communicate easily with this model similar to the well-known ChatGPT. 2. LLaMA Architecture 42dot LLM consists of transformer decoders like the other LLMs, and is constructed with an architecture compatible with LLaMA, one of the most popular LLMs open-sourced by Facebook (Meta). We opted to align our architecture with LLaMA primarily to ensure compatibility with well-established open-source frameworks. Consequently, our models seamlessly run on popular frameworks, enabling their application in Korean contexts. This stands in contrast to LLaMA models, which lack support for the language. It's essential to note that our models were developed from scratch and are qualitatively different and independent of the available LLaMA models. 3. Model Size The 42dot LLM consists of 24 layers, resulting in around 1.3 billion parameters in total. It was trained with over 1.4 trillion tokens, which is of similar scale to the other open-source LLMs such as the above-mentioned LLaMA. We emphasize again, unlike the other LLMs, our data includes a large amount of high-quality Korean texts as well as English texts, resulting in a Korean-English bilingual model that can understand both languages fluently. 4. Tokenizer The process of parsing a sentence into smaller units, such as words or syllables, is called tokenization. These units form a vocabulary utilized by a tokenizer to represent texts in a machine-readable format, presented as a sequence of tokens for processing by Language Models (LLMs). The Byte-Pair Encoding (BPE) algorithm, among various methods, is employed to build such a vocabulary. BPE dissects text into bytes or characters, retaining the most frequently occurring pairs. This method proves particularly advantageous for the Korean language, a highly agglutinative language rich in morphology with a unique writing system. Representing the Korean language poses challenges due to varied ways words and phrases can be tokenized depending on context. BPE adeptly captures these nuances by representing the language as a sequence of sub-word tokens, which can be combined to form larger linguistic units such as words or phrases. Given these advantages, 42dot LLM utilizes BPE tokenization, a choice also embraced by other prominent models like OpenAI's GPT. A custom dictionary, comprising approximately 50,000 BPE sub-word tokens in both Korean and English, was crafted by sampling from a vast pool of over 10 million documents. 5. GPU Training Cluster 42dot has garnered a large amount of compute in order to train powerful LLMs by establishing its own high-performance GPU training cluster, with a capacity to run 320 GPUs simultaneously. Utilizing this infrastructure, we trained 42dot LLM-PLM on A100 80G GPUs with a total of 49,152 GPU hours, which is equivalent to about one week of simultaneous utilization of 320 GPUs. An additional 112 GPU hours of compute was used for fine-tuning the PLM for 42dot LLM-SFT. 6. Evaluation Result The resulting 42dot LLMs outperform other similarly sized large language models in various zero-shot evaluation metrics, in both Korean and English. In a comprehensive dialogue performance evaluation benchmark featuring 121 prompts across ten different categories, our model outperforms similarly sized LLMs by a significant margin. Notably, it is noteworthy that our model's performance is closely competitive with GPT-3.5, a model over 100 times larger, boasting an estimated 175 billion parameters. 7. Public LLM We’ve made the models freely available, along with a generation script so that anyone can easily test and run our LLMs. The models are governed by the CC BY-NC 4.0 license, allowing individuals to utilize them for non-commercial purposes, provided appropriate credit is given. https://huggingface.co/42dot/42dot_LLM-PLM-1.3B https://huggingface.co/42dot/42dot_LLM-SFT-1.3B We believe in the power of the open source ecosystem. Like any LLM, 42dot LLM is not free of limitations and can show signs of hallucinations by generating inaccurate, misleading or inconsistent responses. However, empowered by the potential of open sourcing, we believe that these challenges can be addressed in the foreseeable future. With the introduction of 42dot's Korean-English bilingual language models, we aim to take a positive stride towards enhancing the Korean LLM ecosystem. LLM Group We are developing a large language model to provide new mobility experiences.
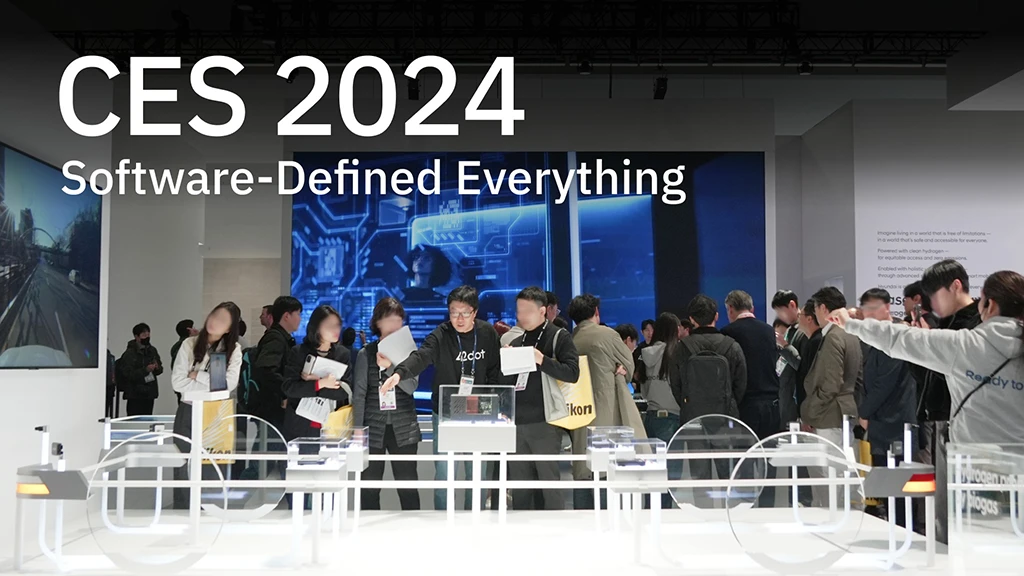
CES 2024 42dot booth with exhibition visitors
Tech2024.03.28

42dot at CES 2024: Software-Defined Vehicle Technology

At CES 2024, 42dot announced its 'software-defined everything' strategy. As Hyundai Motor Company’s Global Software Center, we unveiled the new E/E architecture for SDV and core SDV (software-defined vehicle) technologies. 1. New E/E Architecture for SDV With the ever-expanding features, cars today harbor intricate E/E (electrical and electronics) architectures. Our SDV framework hinges on a hardware and software decoupled structure, a solution that simplifies the vehicle’s architecture and empowers engineers to focus on software development. This strategic decoupling grants engineers the flexibility and agility to enhance vehicle system development while ensuring unparalleled user-centric experiences. The streamlined architecture consists of a centralized HPVC (high-performance vehicle computer), zone controllers responsible for controlling the vehicle's sensors and actuators along with a fault-tolerant SDV OS system. 1.1 HPVC (High-Performance Vehicle Computer) At the crux of the new E/E architecture for SDV, there is the HPVC (high-performance vehicle computer), also known as the brain. These HPVC units are the powerhouse of computation within the SDVs, integrating various functions while assuming the position of primary control. With the HPVC, SDVs can consolidate multiple roles and features into a single unit, reducing the reliance on numerous hardware controllers or multiple domain controllers. There are four main functions: • Autonomous driving stacks covering from Level 2 ADAS to Level 4 automated driving systems, to enhance the user’s safe mobility experience. • In-vehicle infotainment (IVI) for communication betw een the vehicle and the driver/passenger. • Data gateway interconnects HPVC and controllers via a high-speed Ethernet backbone network and handles (collecting, exchanging and storing) a large amount of data internally through high bandwidth and throughput communication . • Connectivity via RF communication to send and receive data outside the vehicle via LTE (5G), BT/WIFI, etc. 1.2 Zone Controller The zone controller is an electronic control unit that manages the vehicle's sensors and actuators. To accelerate the transition to SDV (software-defined vehicle), we physically integrate dozens to hundreds of existing control systems via zone controllers to simplify the E/E architecture. The functions of the control units are reorganized as they integrate into their respective zones. Consequently, the complexity and costs of wire harnesses and communication power nets are significantly reduced. The new E&E architecture for SDV showcases one of its advantages of immediately responding to a malfunction with a fault-tolerant system. When a failure occurs in a zone controller, any other zone controller can take over the role of the failed controller due to the decoupled architecture and fault tolerance of the SDV OS. 1.3 SDV OS The SDV OS efficiently manages applications across the vehicle built with the new E/E architecture, and effectively runs applications on physically distributed hardware, ensuring reliability and efficiency. Additionally, through the unified vehicle API, it enables vehicles composed of physically distributed hardware to be virtually managed as a single product, maximizing software flexibility and optimizing resource utilization across the vehicle. 42dot’s SDV OS is powered by Rust, to operate a mission-critical system that ensures safety. 2. Core SDV Technologies 42dot defines vehicles as ‘AI machines’ (machines that continually learn and improve to better serve). SDVs (software-defined vehicles) are not merely recipients of human-provided data but sophisticated devices that analyze and learn to perceive, plan, and control by utilizing data collected from their own sensors. We would like to introduce the SDV technologies that address the ever-evolving needs of users. 2. 1 Data-Driven Learning Systems To build a smart AI system, 42dot is transforming vehicles into learning machines with the goal of not only advancing AI engineering but also bringing AI & autonomous driving technology to the public. 42dot is continuously collecting, curating, and training data to validate AI models and improve camera-based autonomous driving technology. To optimize the process, they have integrated an agile development of two-week sprints of engineering, performing simulation, deploying into R&D fleets, and eventually deploying software into service fleets. 42dot automates the training, optimization, deployment, and integration process to enhance efficiency (CI/CD). The MLOps and DataOps methodology enables 42dot to create a framework for rapid improvements of AI in mobility. 2.2 Safety-Designed Vehicle Safety is our utmost priority, hence 42dot is implementing safety in all aspects of SDV hardware and software such as strengthening the cybersecurity of SDVs, redundant vehicle network and enhancing safe driving practices. 42dot is committed to developing a comprehensive, integrated SDV security solution that addresses cybersecurity concerns across multiple facets, encompassing the protection of personal information and the prevention of unauthorized data access. Moreover, safe driving can be enhanced through the use of AI. The SDV's AI algorithms employ 3D camera vision to perceive its surroundings, anticipate the vehicle's trajectory based on driver input, and alert against potential collisions with obstacles. This data is sent to the cloud and shared with other vehicles. 2.3 LLM for Advanced Mobility Large language models (LLM) harness the power to learn intricate language structures and when implemented correctly, they have the potential to change the way we move. Now, most existing vehicle AI assistants provide responses in a single-turn method. However, LLM-based assistants offer seamless multi-turn conversations that mirror human interactions. Empowered with the language structures trained from vast amounts of data, 42dot’s AI assistant, based on its own LLM, can generate proper human-like responses. 42dot’s own AI assistant will be integrated into various in-vehicle infotainment apps and connected services such as AI assistant, AI navigation, autonomous driving, intelligent fleet safety & management - the possibilities are endless. The AI assistant can provide tailored recommendations based on one’s habits and lifestyle. It can also generate necessary human readable/listenable alerts which improves the efficiency of fleet management. 2.4 Self-Managed Smart City SDV technologies can extend to fleets and into cities to optimize businesses and cities’ transportation infrastructure. 42dot provides safe, user-centric autonomous technology and mobility algorithms to provide optimized routing based on real-time data. Road data managed via the cloud is shared with all SDV equipped vehicles to provide optimal mobility services. All mobility information such as vehicle, driver, trip data, and real-time traffic information is digitized and managed via a centralized FMS (fleet management system). Vehicle collisions and accidents are handled with AI-driven accident alerts and reporting systems. The 42dot system automatically notifies relevant parties and creates documentation for operation needs. All driver, vehicle and traffic data including video clips are tamper-resistant, managed and protected with blockchain technology. These technologies not only enable us to manage fleets but also efficiently manage the movement of cities through “software-defined everything”. 2.5 Autonomous Mobility Platform TAP! 42dot advances SDV and mobility technologies to provide customer-oriented mobility experiences. 42dot’s ‘TAP!’, the official autonomous mobility platform of Seoul, is leading the commercialization of autonomous mobility. The platform accommodates multiple autonomous vehicles from different providers, including 42dot, in seven different service locations. Users can dispatch different routes and autonomous vehicles such as autonomous taxis and shuttles. At CES 2024, 42dot introduced SDV technology that is continuously updated for optimized performance, just like smart phones. We are applying smartphone development practices to automotive development. 42dot is actively recruiting talents who want to join our journey to making software-defined everything. *Link: https://www.42dot.ai/en/careers/open-roles BMX (Brand Marketing eXperience) Team We are in charge of branding and marketing of 42dot
ZKP layer between prover and verifier
Tech2023.09.12

ZKP, Blockchain, SDV and Mobility

42dot is developing a blockchain platform to provide users with new mobility experiences. Zero-knowledge proof is one of the important technologies of blockchain. This post will cover the technical aspects and the functionalities of the zero-knowledge proof. Additionally, this post will also explain how zero-knowledge proof is applied to 42dot's blockchain and how it can be applied to SDV and mobility services. 1. What is Zero-Knowledge Proof? Zero-knowledge proof (ZKP) is a cryptography technique used by a prover to prove that its statement is true to a verifier. It does not provide (disclose) any information about the claim of the prover, and the verifier performs verification without knowing any information about the prover's claim. For example, let’s suppose A wants to prove to B that he has $10,000. The easiest way is for A to actually show $10,000 to B, or to show his bank account balance certificate. However, this is not ZKP. Because it conveys clear information to B that supports A's claim. In ZKP, A must be able to prove without providing any information related to the money, and B must be able to verify whether A's claim is true without any information related to A's money. As another example, A wants to buy cigarettes or alcohol at a convenience store. The convenience store salesperson B needs to determine whether A is an adult. Generally, B will ask A for identification. In other words, B will look at the ID and check whether A is the right age to buy cigarettes or alcohol. Can A prove that he is an adult without showing his ID? Using ZKP in a case like that, A can prove that he is an adult without showing any ID. As an example for blockchain, A wants to send a virtual asset to B. If ZKP is applied to a transaction in which a virtual asset is transferred, it is possible to prove that the transaction is legitimate while protecting the privacy of A. In this way, ZKP can be used where the user's privacy is important because the prover can prove his/her claim while excluding the disclosure of the information related to the claim. The most common example to explain what ZKP is and how it is possible is the Ali Baba cave problem. There is Alice and Bob. Bob wants to prove that he has a key that can open a door in a cave. The proof process proceeds as follows: The important part here is that in order to prove that Bob has the key, the proof process is performed without showing Alice the key. 1.1 Components of ZKP ZKP consists of three components: • Prover: Subject who wish to prove their claim or statement. • Verifier: Subject that verifies whether the claim or statement of the prover is true. • Claim or statement: What the prover wants to prove to the verifier. 1.2 When can ZKP be used? ZKP can be applied in a variety of cases. Let's take a few examples. • Authentication(Login): When authentication (login) for a certain site or system is required, authentication can be performed by proving that you own the authentication information (password) without entering authentication information (password). • Online voting: ZKP can be used in online secret voting.(zkVoting, a blockchain-based online secret voting system using ZKP, also won the Technology Innovation Award at CES 2023.) • Credentials: ZKP allows you to verify that you are qualified without exposing any information. • Blockchain: By applying ZKP to the transaction data of the blockchain, sensitive information included in the transaction can be hidden. In other words, anonymity of transactions can be provided (shielded/confidential transaction) for privacy, and the amount of data stored in the blockchain can be reduced. Also, it is widely used for the purpose of improving the scalability of the blockchain(zk-rollup). • Data privacy: It can be used for proof without exposing the user's sensitive information (personal information, financial information, etc.). • Proof of knowledge: It can be used to prove that you know the answer to a question, proof information, or data. 2. The process of ZKP In ZKP, given the following function f, the prover proves that it has an input value that makes the result of the function true, and the verifier determines whether the result of the function made by the input value of the prover is true or false. f(x, w) = true/false x is public input of function f and w is private input. Let's assume that the prover wants to prove to the verifier that his bank balance is greater than 1000 won (in fact, the prover's bank balance is 2000 won) without exposing his bank balance. This can be expressed as a function f as follows. f(1000,2000) = true At this time, 1000 becomes the public input x, and 2000 becomes the private input w. Since 2000 is an input value that should not be exposed to a verifier, it is called a private input, another term for it is a witness. After all, ZKP can be said to be a process in which the prover proves that he knows w that makes the result of function f true given x. The programming code for function f is: function f(x, w) { return (x < w); } From a logical point of view, the ZKP consists of three major steps. 2.1 Step 1: Key generation Key generation is performed by a function G defined as: G(f, λ) = (pk, vk) f : program code / circuit λ : random secret parameter pk : proving key vk : verification key Function G is executed by the verifier, and the pk created as a result of function G is shared with the prover. Basically, key generation should only be done once for a given f. 2.2 Step 2: Proof generation Proof generation can be defined as being performed by a function P defined as: P(pk, x, w) = proof pk : proving key x : public input w : private input (witness) proof : proof data Function P is performed by the prover, and proof data is generated using the pk, x and w created in the key generation step. And the proof produced as a result of function P is delivered to the verifier. 2.3 Step 3: Verification Verifying the proof is performed by a function V defined as: V(vk, x, proof) = true/false vk : verification key x : public input proof : proof data Function V is performed by the verifier, and it checks whether the result of function V is true or false using the proof delivered by the prover. That is, the verifier performs verification without knowing w, which only the prover knows. If the result is true, it means that the result of f(x,w) is true, and the verifier can be sure that the prover's claim is true. 3. zk-SNARK zk-SNARK stands for “zero-knowledge Succinct Non-Interactive Argument of Knowledge”, and as you can infer from the name, it is a scheme for Non-Interactive ZKP, and proof is succinct. How zk-SNARK is performed in detail is explained in detail on the page in the link , and please refer to that page. 4. 42dot's Zero-Knowledge Proof, Blockchain, SDV, and Mobility 42dot plans to apply zero-knowledge proof technology to software-defined vehicles (SDV) and mobility services as well as blockchain to provide proof of authentication, credentials, data privacy, and knowledge. That is, zero-knowledge proof techniques can be applied in the following areas: 4.1 Authentication • Authentication of the vehicle itself or mobility service users to blockchain or cloud services can be provided using zero-knowledge proofs. • It can be applied to mutual authentication between ECUs inside a vehicle. • It can also be applied to authentication between SDV apps that interact with SDV OS. 4.2 Authorization • Through zero-knowledge proof, it provides the ability to verify the authority without exposing sensitive information of vehicle/mobility service users. • Proof data in VC/VP of DID can be replaced with zero-knowledge proof data to make it verifiable without information exposure. • Users can verify whether or not they have subscribed to certain features of FoD using zero-knowledge proofs. 4.3 Authorization When logging in to a site or system is required, the ability to log in anonymously (that is, use the service anonymously) by proving that you own the authentication information (password) without entering authentication information (password) provided. 4.4 Data privacy To enhance privacy protection, it provides a function to prove the content of the user's sensitive information (personal information, financial information, etc.) without exposing it. 4.5 Proof of knowledge Provides the ability to determine which information is known or possessed by which data is trusted to be the subject of data sharing. These functions will provide privacy-preserving for sensitive data, authentication/verification, and anonymous for networks and services. Therefore, ZKP is an important element of technology to enable a new type of mobility service with new experiences. Geunyong Yun | Blockchain Platform (Tech Lead) We are developing a blockchain platform to provide a new type of mobility experience.
Multi-view camera to 3D occupancy prediction map
Tech2023.06.30

Team 42dot Wins 2nd Place in the Autonomous Driving Challenge at CVPR 2023

42dot Inc. has presented the solution referred to as MiLO which won the 2nd place (honorable runner-up) in the fiercely contested 3D Occupancy Prediction Challenge for autonomous driving at the Computer Vision and Pattern Recognition Conference (CVPR) 2023; in Vancouver, Canada. This is the first worldwide competition for occupancy prediction, yet being one the most competitive tracks, with almost 150 participating teams from 10 regions. Notably, 42dot's solution does not require access to external data or very large-scale models (models with millions of parameters). 3D occupancy prediction is promising for safe and robust autonomous driving systems. 3D occupancy prediction divides the 3D scenes into a grid of 3D voxels and then estimates voxel occupancy states which are occupied, free, and unobserved. The occupied voxels are further categorized with semantic predictions (such as car, pedestrian, bicycle, etc). Occupancy Prediction addresses the limitations of the conventional object detection approach in two important aspects. First, object detection assign objects of interest with bounding boxes that do not capture the geometric details of the objects. Second, object detectors typically detect objects of interest and ignore uncommon categories. For example, object detectors for car detection will ignore a kangaroo on the street, which is a serious problem in practice. 3D occupancy prediction preserves 3D geometric information and takes the uncommon categories into consideration via occupied/free states. In CVPR 2023 occupancy prediction challenge, team 42dot focuses on optimizing the AI model with constraint data and resources. The proposed method is referred to as Multi-task Learning with Localization Ambiguity Suppression for Occupancy Prediction (MiLO). The method is unique in two important points. First, varying-depth multi-task learning is proposed for task synergy and easing deep network training. Second, localization ambiguity suppression is proposed to adaptively filter out low-confident prediction based on object class and distance. The final model also consists of different techniques for performance improvement and achieves 52.45 points on the challenge leaderboard without external data or large-scale models. MiLO is expected to provide additional insight for accurate 3D occupancy prediction for safe and robust autonomous driving. For more information, check out the technical report and presentation video as below. https://opendrivelab.com/e2ead/AD23Challenge/Track_3_42dot.pdf https://www.youtube.com/watch?v=HyTojp5bSxA Thang Vu | AD algorithm I am in charge of developing perception models from 2D/3D data for autonomous vehicles.
Multilingual speech classified by language model
Publication2023.04.19

Joint Unsupervised and Supervised Learning for Context-aware Language Identification

Conference • The 48th IEEE International Conference on Acoustics, Speech, & Signal Processing (ICASSP) will be held in Rhodes Island, Greece, from June 4 to June 10, 2023, at the Rodos Palace Luxury Convention Center ( https://2023.ieeeicassp.org/ ). • The paper “Joint unsupervised and supervised learning for context-aware language identification” written by Jinseok Park, Hyung Yong Kim, Jihwan Park, Byeong-Yeol Kim, Shukjae Choi, Yunkyu Lim, has been accepted by the ICASSP 2023. • Click the link below for details. https://arxiv.org/abs/2303.16511 Publication • Title: Joint unsupervised and supervised learning for context-aware language identification • Authors: Jinseok Park, Hyung Yong Kim, Jihwan Park, Byeong-Yeol Kim, Shukjae Choi, Yunkyu Lim • Abstract: Language identification (LID) recognizes the language of a spoken utterance automatically. According to recent studies, LID models trained with an automatic speech recognition (ASR) task perform better than those trained with a LID task only. However, we need additional text labels to train the model to recognize speech, and acquiring the text labels is a cost high. In order to overcome this problem, we propose context-aware language identification using a combination of unsupervised and supervised learning without any text labels. The proposed method learns the context of speech through masked language modeling (MLM) loss and simultaneously trains to determine the language of the utterance with supervised learning loss. The proposed joint learning was found to reduce the error rate by 15.6% compared to the same structure model trained by supervised-only learning on a subset of the VoxLingua107 dataset consisting of sub-three-second utterances in 11 languages. Jinseok Park | Speech I’m in charge of developing multilingual speech recognition models for conversational Intelligence.
AWS IoT Core system architecture with CDK
Tech2023.01.05

AWS IoT Core Resource Deployment via CDK

The AWS Cloud Development Kit ( AWS CDK ) is an open source software development framework that allows define cloud application resources to be defined using familiar programming languages. Infrastructure as code (IaC) is a declarative use of code for the management and deployment of infrastructure. AWS CDK generates resources by converting all written code into CloudFormation templates . AWS CDK is just one of many available IaC tools in the industry and another popular tools is Hashicorp Terraform. Terraform can be a little more difficult to adopt due to the introduction of it’s own proprietary coding language know as HCL. In contrast, AWS CDK is an official IaC tool provided by AWS and supports widley known coding languages that developers likely are already familiar with. For those who want to implement IaC for the first time in AWS, if lacking terraform experience, the CDK provided by AWS can be the better option. 1. AWS IoT Core AWS IoT Core is an AWS service that connects and manages IoT devices and can be linked with other AWS services. AWS provides an SDK for IoT Core ( SDK official page ), and devices developed based on it make IoT Core easy to use. IoT Core is responsible for communicating with devices, as it’s name implies it plays a key role in AWS IoT Service. IoT Core enables message routing to be used with storage solutions such as AWS S3 and data pipelines such as MSK (Amazon managed Kafka). In addition, services such as Greengrass , FleetWise , and SiteWise can be utilized to increase the efficiency of IoT device operation and management. In this article, AWS CDK will be used to construct a simple infrastructure with AWS IoT Core. 2. CDK Quick Start Guide: 2.1 CDK Installation For full installation instructions reference the AWS CDK official installation guide . Firstly install the CDK globally through the terminal: npm install -g aws-cdk Now run CDK commands and verify the installed version: cdk --version 2.2 Starting a CDK Project CDK supports several languages, including TypeScript (JavaScript), Python, Go, and .NET. In this article Typescript will be used. Create an empty directory to house the code, and start a CDK project from the terminal with the following command: mkdir cdk-test-project && cd cdk-test-project cdk init --language typescript This will create the model directory structure in root for deploying and testing the CDK code. cdk-test-project ├── README.md ├── bin │ └── cdk-test-project.ts ├── cdk.json ├── jest.config.js ├── lib │ └── cdk-test-project-stack.ts ├── node_modules ├── package-lock.json ├── package.json ├── test └── tsconfig.json Shell The code will be created and located at /bin/cdk-test-project.ts and /lib/cdk-test-project-stack When the cdk init command was ran a sample file located at /lib/cdk-test-project-stack.ts was create automatically. In CDK terminology a stack is where all AWS resources defined within it’s scope, either directly or indirectly, are provisioned as a single unit. The stacks defined in this way are packaged as apps in bin/cdk-test-project.ts and structured for deployment. If defined in multiple stacks, they can be defined them inside the /lib directory and added in to the app in /bin/cdk-test-project.ts directory. 2.3 Connecting a CDK project To connect the locally created code to an AWS cloud environment, first bootstrap an AWS environment. This will provision resources the AWS CDK needs to perform the deployment. Run the following command replacing the account number and region applicable values. cdk bootstrap aws://ACCOUNT-NUMBER/REGION 2.4 CDK Project Deployment Once finished writing the code, output the code into a compiled AWS CloudFormation template using the cdk synth command in the terminal project directory. The execution result of this command creates a cdk.out directory in the root directory and stores the results. cdk synth cdk diff command allows comparison of existing deployed infrastructure in an AWS account with the code defined locally. This is useful for checking what will be deployed, deleted, or updated prior to execution. cdk diff When the cdk deploy is ran it will create the cloud formation templates, check the state of existing resources in the AWS account, and then make the necessary changes to reach the desired state defined in CDK code. When deploying defining which stacks are deploy can be managed by specifying the name of the app or deploying them all with a single command. cdk deploy # When there is only one defined stack cdk deploy STACK_NAME # When there is multiple defined stacks and you wish to deploy one cdk deploy --all # When there is multiple defined stacks and you wish to deploy all IoT Systems / Scenario 1. IoT Architecture For this article, a simple IoT system is portrayed. Vehicles send status data to a server, and the server saves the data in an S3 bucket. The technical scenario is as below. The device in the vehicle sends messages to the IoT core service using the mqtt protocol. The AWS IoT Core service that receives the message forwards the message to an S3 bucket via basic ingest. Basic Ingest is a message routing function provided by AWS IoT core that enables convenient transmission to other services without messaging costs. For this simple example, only two services were provisioned, AWS IoT Core and S3. AWS IoT Core can route messages to a number of AWS services; however, provisioning can get a little more complicated. 2. Device Provisioning 2.1 Scenario-based device provisioning According to the device provisioning AWS guide , there are three options depending on requirements. You can install certificates on IoT devices before they are delivered The first method is the simplest method, which can be leveraged by the device's manufacturer to identify the user and usage. Because the device manufacturer can be identified, it is possible to store and ship the Permanent Certificate(PC) for final use on the device. This method includes Bulk registration, Just In Time Registration (JITR), and Just In Time Provisioning (JITP). End users or installers can use an app to install certificates on their IoT devices The second method is possible in scenarios where the device manufacturer can identify and trust the device's administrator, and this administrator can eventually issue the PC. End users CANNOT use an app to install certificates on their IoT devices The last option is to use it when the device manufacturer does not know when to use the device, the administrator/end-user, nor when the end user starts using the device. In this case, the device needs to issue a PC on its own. In the article the last method described above will be used. This method is mainly used in B2C products where it’s difficult to identify users. In other words, it is a device that many unspecified people will use, but advantageous when the management entity is a service provider. In addition to this, ways to validate devices through pre-provisioning hooks and lambda will be implemented. 2.2 Provisioning by claim Provisioning by claim is achieved through the following process: 2.2.1 Before operation 1) The device stores a claim certificate (CC) inside when released 2) Devices are connected via AWS IoT Core based on CC when first used 3) When the connection using the CC is completed, IoT Core generates a permanent certificate (hereinafter referred to as PC) 4) IoT Core delivers PCs and keys, and the device stores them 5) Device requests registration with AWS IoT Thing 6) AWS IoT calls AWS Lambda Function with pre-provisioning hooks 7) Lambda queries the verification information for the validity of the terminal and delivers the inquiry to the provisioning service of IoT Core 8) If the query is successful, the provisioning service creates cloud resources as defined in the provisioning template 9) Device disconnects using the claim certificate and connects to AWS IoT core with new certificate. After this normal commences 2.2.2 Operation 1) Devices registered as AWS IoT Thing deliver messages to AWS IoT core 2) The messages received by AWS IoT Core are forwarded to S3 Buckets via the rule engine. A flowchart of the procedure above would look something like this: Required Infrastructure Resources Now let's define the infrastructure resources needed to build a system. The infrastructure resource stack required was divided into three main parts, depending on its function. Provisioning template and pre-provisioning hook creation stack name: AwsIotCoreProvisioningInfraStack The first thing required to implement is the registration of AWS IoT Thing, which has a claim certificate, the issuance of a permanent certificate, and the implementation of a template for the provisioning service. Claim certificate creation and storage stack name: AwsIotCoreProvisioningInfraStack The second thing to implement is the issuance and storage of claim certificates. These generated certificates are stored and shipped together in the device firmware and require a permanent certificate which is provisioned on its first use Because of claim certificate's reliance on provisioning template they are provisioned together in the same stack AwsIotCoreProvisioningInfraStack Rule engine message forwarding to S3 Bucket stack name: AwsIotCoreRuleInfraStack Lastly, when messages are reported by the device to AWS IoT Core the Rule engine forwards them to AWS S3 via Basic ingest. More on that here 1. Code Implementation - Before step 1.1 json development pattern All required policies and templates for json documents are based on AWS official documentation (provisioned by claim) and the appropriate environmental variables are updated within the code. This is because CDK code often checks the properties of previously deployed resources, and when using the hard-coded json document it may be unable to track changes. Updating json document code can add an additional layer of complication, and there are confirmed cases when this json update pattern can result in errors. 1.2 Config Setting Define the configuration in Config/config.ts as appropriate. Where s3BucketNameshould be named uniquely named. In this article, the name cdk-s3-test-bucket will be used for the S3 bucket. const Config = { aws: { account: YOUR_ACCOUNT_HERE, region: YOUR_REGION_HERE, }, app: { service: "cdk-test", application: "iot", environment: "dev", }, s3BucketName: cdk - s3 - test - bucket, }; export { Config }; 1.3 Initiated Stack and App The code created by cdk init command has created two main files for us. One will define all the resources for a stack and the other will initiate the stacks into cdk apps. bin/cdk-test-project.ts → Where all the stacks are deployed as CDK Apps. lib/cdk-test-project-stack.ts → Where each stack is combined to create a CDK App cdkTestProjectStack is the default name created by the cdk init command. In this article, two stacks will be composed and deployed - AwsIotCoreProvisioningInfraStack and AwsIotCoreRuleInfraStack. Two separate names were chosen to avoid confusion and to better describe what the stacks are provisioning. The comments in initiated codes are sample codes by CDK, left them for reference. Changed contents CdkTestProjectStack → AwsIotCoreProvisioningInfraStack Additionally to avoid confusion the resource ID (the second input) in AwsIotCoreProvisioningInfraStackwas replaced. Modified Config lib/cdk-test-project-stack.ts import * as cdk from "aws-cdk-lib"; import { Construct } from "constructs"; // import * as sqs from 'aws-cdk-lib/aws-sqs'; export class AwsIotCoreProvisioningInfraStack extends cdk.Stack { constructor(scope: Construct, id: string, props?: cdk.StackProps) { super(scope, id, props); // The code that defines your stack goes here // example resource // const queue = new sqs.Queue(this, 'CdkTestProjectQueue', { // visibilityTimeout: cdk.Duration.seconds(300) // }); } } /bin/cdk-test-project.ts import "source-map-support/register"; import * as cdk from "aws-cdk-lib"; import { CdkTestProjectStack } from "../lib/cdk-test-project-stack"; const app = new cdk.App(); new AwsIotCoreProvisioningInfraStack(app, "AwsIotCoreProvisioningInfraStack", { /* If you don't specify 'env', this stack will be environment-agnostic. * Account/Region-dependent features and context lookups will not work, * but a single synthesized template can be deployed anywhere. */ /* Uncomment the next line to specialize this stack for the AWS Account * and Region that are implied by the current CLI configuration. */ // env: { account: process.env.CDK_DEFAULT_ACCOUNT, region: process.env.CDK_DEFAULT_REGION }, /* Uncomment the next line if you know exactly what Account and Region you * want to deploy the stack to. */ // env: { account: '123456789012', region: 'us-east-1' }, /* For more information, see https://docs.aws.amazon.com/cdk/latest/guide/environments.html */ }); Now everything is prepared and ready to be deployed cdk-test-project-stack.ts 2. Implementation for Provisioning template and pre-provisioning hook 2.1 Policy for test device This is the device policy for a Thing that has received its permanent certificate and been provisioned. Refer to the Basic AWS IoT Core policy variables here . device/device-policy.json { "Version": "2012-10-17", "Statement": [ { "Effect": "Allow", "Action": "iot:Connect", "Resource": "*" }, { "Effect": "Allow", "Action": [ "iot:Publish", "iot:Receive", "iot:RetainPublish" ], "Resource": [""] }, { "Effect": "Allow", "Action": "iot:Subscribe", "Resource": [""] } ] } Insert the above policy using the name testDevicePolicyJson and update the env variables. To simplify the process a relatively wide range of permissions was used, for best practice always follow the AWS model of least privileges. Based on the modified file aws_iot.CfnPolicy the AWS IoT Policy is created. For this it is important to pay close attention to the Resources associated with {Action: [iot:Publish, iot:Receive, iot:RetainPublish]} and the keywords topic and topicfilter for the {Action: iot:Subscribe} action as they have different uses. The policy should be adjusted based on the application. testDevicePolicyJson.Statement[1].Resource = [ `arn:aws:iot:${Config.aws.region}:${Config.aws.account}:topic/$aws/rules/*`, `arn:aws:iot:${Config.aws.region}:${Config.aws.account}:topic/` + '${iot:ClientId}' ] testDevicePolicyJson.Statement[2].Resource = [ `arn:aws:iot:${Config.aws.region}:${Config.aws.account}:topicfilter/` + '${iot:ClientId}' ] let testDevicePolicy = new iot.CfnPolicy( this, Config.app.service + "-" + Config.app.environment + "device-policy", { policyDocument: testDevicePolicyJson, policyName: Config.app.service + "-" + Config.app.environment + "-device-policy", } ); 2.2 Role for pre-provisioning-lambda This is the AWS IAM Role for the previously created pre-provisioning Lambda Function: let rolePreProvisioningLambda = new iam.Role( this, Config.app.service + "-" + Config.app.environment + "-pre-provisioning-lambda-role", { assumedBy: new iam.ServicePrincipal("lambda.amazonaws.com"), description: "AWS IAM role for pre-provisioning lambda", roleName: Config.app.service + "-" + Config.app.environment + "-pre-provisioning-lambda-role", } ); 2.3 Lambda function for verifying devices This Lambda function validates the device's serial information when invoked, which is enabled through a pre-provisioning hook. For this function to return True, it must be determined that the device's serial information can be viewed by another system or can be validated through other methods. import json import logging import sys # Configure logging logger = logging.getLogger() for h in logger.handlers: logger.removeHandler(h) h = logging.StreamHandler(sys.stdout) FORMAT = "[%(asctime)s - %(levelname)s - %(filename)s:%(lineno)s - %(funcName)s - %(message)s" h.setFormatter(logging.Formatter(FORMAT)) logger.addHandler(h) logger.setLevel(logging.INFO) SERIAL_STARTSWITH = "297468" def verify_serial(serial_number): if serial_number.startswith(SERIAL_STARTSWITH): logger.info("serial_number {} verification succeeded - starts with {}".format(serial_number, SERIAL_STARTSWITH)) return True logger.error("serial_number {} verification failed - does not start with {}".format(serial_number, SERIAL_STARTSWITH)) return False def lambda_handler(event, context): response = {'allowProvisioning': False} logger.info("event: {}".format(json.dumps(event, indent=2))) if not "SerialNumber" in event["parameters"]: logger.error("SerialNumber not provided") else: serial_number = event["parameters"]["SerialNumber"] if verify_serial(serial_number): response = {'allowProvisioning': True} logger.info("response: {}".format(response)) return response Before declaring a resource for the lambda function, first, declare the function to be executed in device/verify-device-lambda.py. The example function above is a simple validation function created with Python. To simplify the problem, instead of querying the DB and files, simply verify that Serial Number starts with 297468, and configured it to return True/False values based on the results. let lambdaPreProvisioningHook = new lambda.Function( this, Config.app.service + "-" + Config.app.environment + "-pre-provisioning-hook-lambda", { code: lambda.Code.fromAsset(path.join(__dirname, "device")), handler: "lambda_function.lambda_handler", runtime: lambda.Runtime.PYTHON_3_9, role: rolePreProvisioningLambda, description: "Lambda for pre-provisioning hook", functionName: Config.app.service + "-" + Config.app.environment + "-pre-provisioning-hook-lambda", } ); lambdaPreProvisioningHook.addPermission("InvokePermission", { principal: new iam.ServicePrincipal("iot.amazonaws.com"), action: "lambda:InvokeFunction", }); Note the code path and handler path when declaring resources in the AWS lambda function. Through the lambda.Code.fromAsset method the created code can be retrieved. handler within lambda is handler: {python filename}.Write {name of the function that actually works}. Finally, allow the AWS IoT service to invoke the corresponding lambda function. Inside the lambda’s handler, fill the following out like this: handler: {python }.{}. Finally, grant AWS IoT Service permissions to invoke the lambda function. 2.4 Role for provisioning template Here a role for the provisioning service is created. Since the provisioning service also works through the iot service, set the subject of the assume to iot.amazonaws.com. let roleProvisioning = new iam.Role( this, Config.app.service + "-" + Config.app.environment + "-provisioning-template-role", { assumedBy: new iam.ServicePrincipal("iot.amazonaws.com"), description: "AWS IAM role for provisioning services", roleName: Config.app.service + "-" + Config.app.environment + "-provisioning-template-role", } ); roleProvisioning.addManagedPolicy( iam.ManagedPolicy.fromAwsManagedPolicyName( "service-role/AWSIoTThingsRegistration" ) ); 2.5 ProvisioningTemplate Here the provisioning template that defines the provisioning services are created. Defining the template is one of the most important parts for provisioning. Refer to an example base provisioning template provided by AWS here . In this article for fleet provisioning, a template that specifies the ThingName pattern as test-thing-{SerialNumber} is configured. In the base template, match the ThingName section by inserting the following: "ThingName": { "Fn::Join": [ "", [ "test-thing-", { "Ref": "SerialNumber" } ] ] } device/provisioning-template.json { "Parameters": { "SerialNumber": { "Type": "String" }, "AWS::IoT::Certificate::Id": { "Type": "String" } }, "Resources": { "certificate": { "Properties": { "CertificateId": { "Ref": "AWS::IoT::Certificate::Id" }, "Status": "Active" }, "Type": "AWS::IoT::Certificate" }, "policy": { "Properties": { "PolicyName": "" }, "Type": "AWS::IoT::Policy" }, "thing": { "Type": "AWS::IoT::Thing", "OverrideSettings": { "AttributePayload": "MERGE", "ThingGroups": "DO_NOTHING", "ThingTypeName": "REPLACE" }, "Properties": { "AttributePayload": {}, "ThingGroups": [], "ThingName": { "Fn::Join": [ "", [ "test-thing-", { "Ref": "SerialNumber" } ] ] } } } } } Within the CDK code, associate the policy for the provisioning service to the document configured above and convert it to a provisioning template resource through the CfnProvisioningTemplate command. The pre-provisioning hook is set through the parameter inside the preProvisioningHook. Because the lambda function must be invoked each time during each provisioning process, the preProvisioningHook option simply sets the payloadVersion and the targetArn of the lambda defined above as parameters. testProvisioningTemplateJson.Resources.policy.Properties.PolicyName = testDevicePolicy.policyName! testProvisioningTemplateJson.Resources.policy.Properties.PolicyName = testDevicePolicy.policyName! let testProvisioningTemplate = new iot.CfnProvisioningTemplate( this, Config.app.service + "-" + Config.app.environment + "-provision-template", { provisioningRoleArn: roleProvisioning.roleArn, templateBody: JSON.stringify(testProvisioningTemplateJson), enabled: true, preProvisioningHook: { "payloadVersion": "2020-04-01", "targetArn": lambdaPreProvisioningHook.functionArn }, description: "AWS IoT Provisioning Template", templateName: Config.app.service + "-" + Config.app.environment + "-provision-template", } ); 3. Claim Certificate and related AWS Infra resources provisioning 3.1 Resources not provisioned through the CDK AWS IoT Core typically uses the Console to build infrastructure. Because there are many resource elements intertwined, it is most convenient to implement them intuitively through the console. In addition, since AWS IoT is a relatively new service compared to other services, CDK official documents are lacking in detail and explanations. Best efforts were made to reference the CDK documents to replace manual steps through the console, but sometimes the CDK is lacking in functionality available only through the console or CLI. For this, create custom resources or use the ConstructHub. ConstructHub Many variations of IAC resources for AWS can be found here. Not only for the CDK but for other IAC tools such as terraform. AWS custom resources Custom resources supported in the CDK SDK or CLI commands can be utilized here to create CDK deployable resources. For this section, the base CDK was not utilized, but instead an attempt was made to utilize an AWS Custom Resource to generate our certificates. 3.2 S3 Bucket First, create an S3 Bucket to store our claim certificate. Set the S3bucketName in the config.ts file. If the project requires a pre-existing bucket for this, the methods ( fromBucketArn , fromBucketAttributes , fromBucketName ) can be utilized. let cdkTestS3Bucket = new s3.Bucket(this, 'cdkTestS3Bucket', { blockPublicAccess: s3.BlockPublicAccess.BLOCK_ALL, versioned: true, removalPolicy: RemovalPolicy.DESTROY, autoDeleteObjects: true, bucketName: `${Config.s3BucketName}` } ); 3.3 Policy for Claim Certificate First, define the policy that the temporary claim certificate will use. The claim certificate policy is based on the basic IoT policy. device/device-policy.json for the claim certificate policy here, reference the AWS official documents here . device/cc-policy.json1 { "Version": "2012-10-17", "Statement": [ { "Effect": "Allow", "Action": ["iot:Connect", "iot:RetainPublish"], "Resource": "*" }, { "Effect": "Allow", "Action": ["iot:Publish","iot:Receive", "iot:RetainPublish"], "Resource": [""] }, { "Effect": "Allow", "Action": "iot:Subscribe", "Resource": [""] } ] } Update the above-defined base policy with the required contents and it will be created by the CfnPolicy command named testDeviceClaimCertificatePolicy. Since the provisioning is requested through the claim certificate a provision policy must also be defined. let templateTopicCreate = `arn:aws:iot:${Config.aws.region}:${Config.aws.account}:topic/$aws/certificates/create/*` let templateTopicProvisioning = `arn:aws:iot:${Config.aws.region}:${Config.aws.account}:topic/$aws/provisioning-templates/${testProvisioningTemplate.templateName}/provision/*` testDeviceClaimCertificatePolicyJson.Statement[1].Resource = [templateTopicCreate, templateTopicProvisioning] let templateTopicFilterCreate = `arn:aws:iot:${Config.aws.region}:${Config.aws.account}:topicfilter/$aws/certificates/create/*` let templateTopicFilterProvisioning = `arn:aws:iot:${Config.aws.region}:${Config.aws.account}:topicfilter/$aws/provisioning-templates/${testProvisioningTemplate.templateName}/provision/*` testDeviceClaimCertificatePolicyJson.Statement[2].Resource = [templateTopicFilterCreate, templateTopicFilterProvisioning] let testDeviceClaimCertificatePolicy = new iot.CfnPolicy( this, Config.app.service + "-" + Config.app.environment + "-claim-certificate-policy", { policyDocument: testDeviceClaimCertificatePolicyJson, policyName: Config.app.service + "-" + Config.app.environment + "-claim-certificate-policy", } ); 3.4 Claim Certificate(CustomResource) Now let's looks the claim certificate process. Through the AWS IoT Core Console certificate tab certificates can be easily be generated, but unfortunately the CDK does not support those commands. The certificates use Open SSL and are typically created through CLI making it difficult to provision through IAC. However as mentioned earlier, AwsCustomResource can be utilized to create the certificate and store it in S3. Utilized the AWS SDK CreateKeysAndCertificateapi, a cdk custom resource can be used to call the API and output 4 objects certificateArn, certificatePem, keyPair.PublicKey, and keyPair.PrivateKey . let createKeysAndCertificateForClaimCertificate = new AwsCustomResource( this, Config.app.service + "-" + Config.app.environment + "-create-keys-and-certificate-for-claim-certificate", { onUpdate: { service: "Iot", action: "createKeysAndCertificate", parameters: {setAsActive: true}, physicalResourceId: PhysicalResourceId.fromResponse("certificateId"), outputPaths: ["certificateArn", "certificatePem", "keyPair.PublicKey", "keyPair.PrivateKey"], }, policy: AwsCustomResourcePolicy.fromSdkCalls({resources: AwsCustomResourcePolicy.ANY_RESOURCE}), } ); 3.5 Key Deployment to S3(CustomResource) In this section, the method for storing the objects in S3 will be explained. In the above process, a Claim Certificate object has already been received and the S3 bucket has already been provisioned in previous steps. Using the cdkTestS3Bucket as the destinationBucket the keys of the claim-certificate can be stored from the response field of the custom resource. let keyDeploymentForDeviceClaimCertificate = new aws_s3_deployment.BucketDeployment( this, Config.app.service + "-" + Config.app.environment + "put-key-to-s3", { destinationBucket: cdkTestS3Bucket, sources: [ aws_s3_deployment.Source.data( "claim-certificate/claim.pem", createKeysAndCertificateForClaimCertificate.getResponseField( "certificatePem" ) ), aws_s3_deployment.Source.data( "claim-certificate/claim.public.key", createKeysAndCertificateForClaimCertificate.getResponseField( "keyPair.PublicKey" ) ), aws_s3_deployment.Source.data( "claim-certificate/claim.private.key", createKeysAndCertificateForClaimCertificate.getResponseField( "keyPair.PrivateKey" ) ), ], } ); 3.6 Policy attachment for claim Certificate Finally, attach the certificate claim to the policy. let PolicyPrincipalAttachmentForClaimCertificate = new iot.CfnPolicyPrincipalAttachment(this, Config.app.service + "-" + Config.app.environment + "policy-principal-attachment", { policyName: testDeviceClaimCertificatePolicy.policyName!, principal: createKeysAndCertificateForClaimCertificate.getResponseField("certificateArn")}); 4. Rule engine for routing messages to S3 storage In this part, add the lib/aws-iot-core-rule-infra-stack.ts file which contains the AwsIotCoreRuleInfraStack stack. This stack will use the two JSON files rulePolicyJsonand ruleKeysJson. Import these into the stack at the beginning. It can be done like this: import { Stack, StackProps, aws_iot as iot, aws_iam as iam, aws_s3 as s3, } from "aws-cdk-lib"; import { Construct } from "constructs"; import { Config } from "../config/config"; import rulePolicyJson from "./rule/rule-policy.json"; import ruleKeysJson from "./rule/rule-keys.json"; export class AwsIotCoreRuleInfraStack extends Stack { constructor(scope: Construct, id: string, props?: StackProps) { super(scope, id, props); } } 4.1 Role for rule Engine Rule Engines is one of the internal services of AWS IoT Core. The Rule Engine plays the function of relaying messages to other services. First make an AWS IAM Role for the rule engine and grant it the ability to assume IoT Core with the subject iam.ServicePrincipal(iot.amazonaws.com). // Create role for Rule engine let roleRuleEngine = new iam.Role( this, Config.app.service + "-" + Config.app.environment + "-rule-engine-role", { assumedBy: new iam.ServicePrincipal("iot.amazonaws.com"), description: "AWS I AM role for IoT rule engine", roleName: Config.app.service + "-" + Config.app.environment + "-rule-engine-role", } ); 4.2 s3 bucket (revisited) Next, import the existing S3 bucket in typescript using the CDK. Since S3 is used to store the claim certificates as part of the earlier AwsIotCoreProvisioningInfraStack it already exists. Store the name of the S3 bucket in the typescript config/config.ts file and reference it as ${Config.s3BucketName}. // Get S3 bucket from bucket name let cdkTestS3Bucket = s3.Bucket.fromBucketName(this, "cdkTestBucket",`${Config.s3BucketName}`); 4.3 Policy for role for rule Time to define the required policy for the Rule Engine. It requires the s3:PutObject permissions to store messages. The policy in a JSON file is defined like this:rule/rule-policy.json { "Version": "2012-10-17", "Statement": [ { "Action": "s3:PutObject", "Resource": [""], "Effect": "Allow" } ] } In the defined rule-policy.json base file update the S3 Resource and create the policy. After a policy is created, assign it to the IAM role that was created earlier. // Create policy and attach it to IoT Role. rulePolicyJson.Statement[0].Resource = [cdkTestS3Bucket.bucketArn + "/*"] let iotCoreRolePolicy = iam.PolicyDocument.fromJson(rulePolicyJson); new iam.Policy( this, Config.app.service + "-" + Config.app.environment + "-iot-core-role-policy", { document: iotCoreRolePolicy, policyName: "iotCoreRolePolicy", } ).attachToRole(roleRuleEngine); 4.4 Rule for pre-defined keys Now, make an IoT Core rule. In this post, three rules will be provisioned: rule1, rule2, and rule3. The roles will be used by the following Json document to create multiple rules at the same time through iteration.rule/rule-keys.json { "testRules": [ "rule1", "rule2", "rule3" ] } Each rule created through the CDK code is created with a test-rule/{key} naming convention. The Keys are used to record data in S3 files and according to the AWS Docs, it’s best to include a timestamp. So accordingly create keys with a${topic()}/${timestamp()} naming convention. Additionally, to ensure the topics are easily queryable with SQL we decided to use `SELECT * FROM 'test-rule/${key}'`. Again here a 'for loop' was used for iteration to ensure that each testRules were provisioned accordingly. // Get rules from ruleKeysJson let testRuleKeys = ruleKeysJson.testRules; // Create Rules in IoT Core testRuleKeys.forEach((key) => { new iot.CfnTopicRule( this, Config.app.service + "-" + Config.app.environment + `-topic-rule-${key}`, { topicRulePayload: { actions: [ { s3: { roleArn: roleRuleEngine.roleArn, bucketName: `cdk-s3-test-bucket`, key: "${topic()}/${timestamp()}", }, } ], sql: `SELECT * FROM 'test-rule/${key}'`, }, // iot does not allow rule '-' (dash). ruleName: `test_rule_${key}`, } ); }); Now all the steps have been completed. When an IoT Device sends a message, it is forwarded via the topic-rule/${key} topic. and saved in an S3 bucket with the naming convention ${topic()}/${timestamp()} . The ability to forward messages to other AWS services through this simple rule definition is called basic ingest, which is not charged by AWS. The fact that AWS doesn’t charge for basic ingest is its biggest advantage when storing logs or creating S3 Data lakes. 5. The structure of the cdk app provisioned This is the file structure tree created from the CDK Init command cdk-test-project ├── README.md ├── bin │ └── aws-iot-infra.ts ├── cdk.json ├── config │ └── config.ts ├── jest.config.js ├── lib │ ├── aws-iot-core-provisioning-infra-stack.ts │ ├── aws-iot-core-rule-infra-stack.ts │ └── device │ │ ├── device/device-cc-policy.json │ │ ├── device/device-policy.json │ │ ├── device/provisioning-template.json │ │ └── device/verify-devices-lambda.py │ └── rule │ ├── rule/rule-keys.json │ └── rule/rule-policy.json ├── node_modules ├── package-lock.json ├── package.json ├── test ├── tsconfig.json └── yarn.lock In this article, a system to collect device data with AWS IoT Core deployed through the AWS CDK was provisioned. Operational Scenario Summary The messages generated by the devices are sent to AWS IoT Core Claims and certificates were used to make this possible A lambda provisioning hook was used to validate the device validation AWS CDK provisioned resource summary Provisioning template and pre-provisioning hook provisioning Device policy, device validation lambda provisioning AWS IAM Role, and provisioning template definitions Claim certificate creation and storage S3 bucket, claim certificate policy, Claim certificate provisioned through AWS Custom Resource, process for storing it onto S3, and policy attachment to certificate. Device message delivery through AWS IoT Core Rule engine’s Basic Ingestion for S3 storage. Rule Engine IAM Role and Policy, Rule definition Conclusion In this post, the CDK was used to provision AWS IoT Core System for device registration and storage. Whenever architecting a new Infrastructure it is important to understand the functions of the different AWS Services such as EC2 and S3. By using the AWS CDK tool the highest level of compatibility was ensured. As the complexity and scale of the infrastructure increase, it helps to take a more declarative approach when defining the architecture. Tools like Terraform or the AWS CDK help make this possible. AWS CDK is officially supported and maintained by AWS themselves and is an excellent IAC tool if the lack of vendor agnosticism is not a conncern. Even though it’s possible to deploy resources like this using the AWS Console or CLI it becomes increasingly difficult over time and harder to increase the scale of applications. Unfortunately, AWS IoT Core is a relatively new service within AWS services, where the official document description still leaves a lot to be desired. There were a couple of blockers while developing this with the CDK especially with the provisioning of certificates (a function supported by the SDK). To overcome this, the AwsCustomResource construct of the CDK was utilized to create the custom code to call the AWS API with the SDK commands. As described by AWS Documentation “Defines a custom resource that is materialized using specific AWS API calls. These calls are created using a singleton Lambda function”. The hope is that AWS continues to improve the CDK constructs for IoT as the service continues to mature. Seungbeom Lee | Fleet Platfrom In charge of Fleet Platform software and Intelligent Fleet Safety solutions. Jinhyeong Kim | Fleet Platform In charge of developing Fleet Platform System software Alec Zebrick | Cloud Infrastructure In charge of developing cloud infrastructure and kubernetes for autonomous driving technologies References 1) Official AWS CDK Documentation AWS CDK API reference AWS CDK Examples github 2) Blogs Managing Missing CloudFormation Support with the AWS CDK My experience on Infra as Code with AWS CDK + Tips & Tricks
Autonomous vehicle perception with speed detection
Tech2022.12.26

ML Data Platform for Continuous Learning

42dot actively uses machine learning technologies to develop autonomous driving systems. Machine learning development requires high-level algorithms, large amounts of data, complex computing operations, and support of software and hardware to perform them. On top of this, 42dot tailors various technologies to develop and operate a machine learning&data Platform. Even now, 42dot's machine learning developers are using the above-mentioned platform for effective development. Data Pipeline Data is very important in machine learning development. A large amount of data is required to improve the performance of a machine learning model. It is also important to curate a dataset that will boost its performance. This data preparation process is a complex and time-consuming task. 42dot hence develops and operates an automated data pipeline, which smoothly processes all data-related task to support in-house machine learning developers. Data pipeline works in the following processes: 1) Data collected from our autonomous vehicles is transmitted to the cloud and data center through the edge cluster of each site. 2) Data sent to the cloud passes through transformation and indexing for retrieval before being stored in a database. 3) The data sent to the data center is stored in the database after passing the weakness detection pipeline for the data curation. 4) The saved data is either used in the development process for the debugging and re-simulator. Also, a data console accelerates data curation processes. 5) Additional privacy protection measures such as personal information encryption and de-identification takes place. 6) The data after labeling is stored in the shared storage connected to the GPU cluster. The machine learning developers can work by accessing the annotated datasets using the Kubeflow-based ML workspace. ML Workspace Training of machine learning models requires a lot of computation that depends on many GPUs. The machine learning developers simultaneously request multiple GPU resources; therefore, the efficient utilization of the GPUs is important. In fact, we could become more productive as our ML workspace allows faster model training despite the limited resources. It is necessary to prepare a development environment, for instance, installing various libraries. For such requirements, 42dot provides an ML workspace based on Kubeflow. In the case of a GPU cluster, we configure a Kubernetes cluster with multiple GPU servers and connect it to a shared storage that allows direct access using a high-speed network. We then build a Kubeflow-based system in the cluster to support easy access of the resources to the in-house developers. Precisely, the developers can request virtual server instances with desired specifications, such as CPU, memory, GPU, etc., and return the resources after completing their tasks. Such dedicated virtual server instances can be accessed through a web browser, where we provide the most popular features for machine learning development. ML Pipeline To make a product-grade machine learning model, we should repeat the following processes: training, evaluation, model transformation, integration testing, and deployment. To speed up the development processes and focus on the main tasks, we automate repetitive tasks as much as possible so that developers can offload routine jobs. First, we leverage MLFlow to support tracking interim training of histories and model registration. All training processes are automatically recorded in MLFlow, installed in the cloud, and the results of training are stored in the model registry. Authorized users can search for the best model and its configurations including hyper-parameters to reproduce the model. Also, the user can monitor the training process and result throughout the API. Second, we build the ML pipelines. When training outcomes are registered in the Model Registry, we automatically perform the following pipelines: evaluation, model transformation, and testing. Dozens of pipelines are in operation using Kubeflow and are performed automatically more than hundreds of times a day, accelerating the development of autonomous driving systems. ・ ・ ・ In this post, we have introduced the ML data platform used by the 42dot machine learning development team. The ML data platform will continue its efforts to accelerate the journey of bringing autonomous driving systems closer to our everyday lives. Eddie Yang | Data & ML (Tech Lead) I am in charge of developing Machine Learning & Data platform for autonomous vehicles.
OTA update flow from cloud to vehicles and drone
Tech2022.11.25

속도와 보안이 강화된 OTA 업데이트

모든 것들이 스스로 움직이고 끊김 없이 연결된 세상을 만든다 42dot에서는 모든 것들이 스스로 움직이게 하기 위해서 자율 주행 제어 장치를 개발하고 있습니다. 이 장치는 다양한 센서(카메라, 레이더 등)를 활용해서 주변 상황을 인지/판단하고 지도/측위 기술 등을 조합해서 주행 경로에 따라 장치 스스로 조향 각과 가감속과 같은 다양한 이동 과정의 제어를 수행합니다. 자율주행 장치의 이동을 비용 효율적, 안정적으로 보장하기 위해서는 장치를 구동 시키는 운영 체제 및 애플리케이션들을 빠르고 지속적으로, 원격에서 신규 기능 적용뿐만 아니라 성능 개선, 버그 수정, 보안 패치 등의 소프트웨어 업데이트가 끊김 없이 이루어져야 가능합니다. 이것은 OTA 업데이트 기술을 통해 지속 가능하게 할 수 있습니다. OTA(Over-the-air)? Software 및 firmware를 update 하는 방식 중에 하나로, update를 하기 위해 유선으로 host machine에 연결하지 않고 무선으로 원격지의 device를 update 하는 방식입니다. OTA 방식에 따라 SOTA(Software-over-the-air)와 FOTA(Firmware-over-the-air)로 나누기도 하는데, 보통 SOTA는 다양한 software component들을 대상으로 하고 있고, FOTA는 특정 device에 국한된 update 방식으로 볼 수 있습니다. 1. OTA 업데이트 기술은 안정성과 보안이 핵심 잘못 설치되거나 네트워크 전송 오류로 인해 일부 파일 내용이 손상된 OTA 업데이트는 장치를 동작하지 않는 “벽돌"로 만들어서 이용자에게 상당한 불편을 초래할 뿐만 아니라 장치 공급자에 대한 평판 및 금전적인 손상까지 이어질 수 있습니다. 해커가 OTA 서버에 중간자 공격(man-in-the-middle attack) 통해 자율주행 제어 장치의 주요 운영체제 모듈 및 애플리케이션들의 바이너리를 확보하고 리버스 엔지니어링을 통해 악의적인 목적으로 위변조 된 소프트웨어를 해당 장치에 다시 배포할 수 있습니다. 또한 알려진 소프트웨어 보안 취약점을 악용해서 해당 장치에 원격으로 침입하여 민감한 데이터를 훔치거나 물리적인 자율 주행 이동의 제어권을 장악할 수 있습니다. 중간자 공격(Man-in-the-middle attack)? 네트워크 통신을 조작하여 통신 내용을 도청하거나 조작하는 공격 기법이다. 중간자 공격은 통신을 연결하는 두 사람 사이에 중간자가 침입하여, 두 사람은 상대방에게 연결했다고 생각하지만 실제로는 두 사람은 중간자에게 연결되어 있으며 중간자가 한쪽에서 전달된 정보를 도청 및 조작한 후 다른 쪽으로 전달합니다. 예를 들어, 위 그림처럼 해커가 클라우드에 연결된 차량의 모뎀에 가짜 기지국 연결과 같은 중간자 공격을 통해 셀룰러 통신 데이터를 가로채기 및 위변조가 가능합니다. OTA 업데이트 기능의 3가지 필수 사항 1. 전원 및 네트워크로 인한 오류 발생 시 이전 안정화 버전 롤백 자율 주행 장치는 이동을 제어하기 위한 목적의 장치이므로 네트워크 연결 및 전원 공급의 불량으로 인해 업데이트가 실패 되면 이전 안정화 버전으로 돌아가는 롤백 기능이 기본적으로 제공되어야 합니다. Dual A/B 파티션 전략을 이용하면 비활성 루트 파일 시스템 파티션에 변경된 소프트웨어 업데이트 파일들을 설치하고 재부팅 이후에 부트로더가 해당 파티션에서 부팅 되도록 구성하는 방식으로 가장 안정적이고 빠른 롤백 기능 구현이 가능합니다. 2. 변경된 부분만 다운로드하고 패치(Delta 업데이트 지원) 네트워크 대역폭이 제한된 환경에서 기가 단위인 대용량 자율주행 운영체제를 포함한 소프트웨어를 배포해야 하는 경우 해당 장치의 배터리 전력이 빠르게 소모되거나 네트워크 사용 비용 증가 등 여러 가지 문제점이 발생할 수 있습니다. 따라서 OTA 업데이트를 진행할 파일의 크기와 시간, 네트워크 대역폭을 크게 절약할 수 있는 변경된 부분만 업데이트하는 Delta 업데이트 기술 메커니즘 도입이 필요합니다. 3. 가짜 OTA 업데이트 요청 거부 및 위변조된 소프트웨어 배포 방지 신규로 설치될 소프트웨어는 설치 대상 기기의 고유한 하드웨어 식별자와 인증서 기반의 공개키로 상호 인증된 장치에서만 다운로드 및 설치되어야 합니다. 추가적으로 암호화 및 코드 사이닝 적용을 통해서 설치 대상 소프트웨어(bootloader, kernel, root filesystem 등) 무결성을 보장하고 주요 애플리케이션 파일 및 데이터 위변조 공격으로부터 보호해야 합니다. 자율주행 장치와 클라우드 간에 종단 간(E2E) 암호화 통신을 위한 secure channel을 통해 클라우드 서버와 상호 인증된 자율 주행 장치만의 네트워크 통신만 허용해서 외부 공격을 원천적으로 차단하고 장치 내에서 외부로 나가는 통신을 지속적으로 모니터링하여 비정상적인 네트워크 연결 트래픽이 있는지 모니터링해야 합니다. Safe and Secure Over-the-air(SOTA) Software Update 1. 소개 42dot은 모든 장치에 쉽고, 빠르게, 안정적이고 안전한 소프트웨어 업데이트 적용 및 운영이 가능하게 해 주는 SaaS 형태의 솔루션을 자체 개발하고 있습니다. 등록된 모든 장치의 소프트웨어 배포 작업은 원격에서 중앙 통합 관리되며, 다음과 같은 주요 기능을 제공해서 안정적이고 안전한 OTA 소프트웨어 구현의 핵심 기술을 대상 장치에 빠르고 손쉽게 적용이 가능합니다. 2 주요 기능 2.1 공개키(PKCS#11) 기반의 장치 등록 및 인증 솔루션에 연결을 위한 장치를 프로비저닝 하려면 장치 / 서버 간 상호 인증서(x.509)와 private key를 생성하고 전자 서명 유효성 체크해야 합니다. 이때 생성된 장치 인증서와 private key는 하드웨어 방식인 HSM (Hardware Security Module) 또는 소프트웨어 방식인 ARM TrustZone 기술을 사용해서 TEE(Trusted Execution Environment)와 같은 안전한 영역에 대상 장치에 주입하고 장치 등록 및 인증을 하기 위한 CLI 프로비저닝 도구를 제공합니다. TrustZone? TrustZone은 ARM에서 개발한 ARMv6 이상의 CPU에서 추가된 보안 확장 집합인데 CPU, 주소 공간, 메모리를 하드웨어 단위로 분리하여 기밀성과 무결성을 제공할 수 있는 보안 및 비 보안으로 격리된 환경을 제공하는 기술입니다. 42dot은 PKCS#11과 OP-TEE OS를 조합한 소프트웨어 방식으로 private key나 인증서를 TEE 영역에서 저장하고 다양한 암복호화 및 서명 알고리즘을 사용하는 방식을 제공함으로써, 일반적으로 I2C 또는 SPI 인터페이스를 통해 메인 프로세스에 연결된 전통적인 하드웨어 방식의 전용 보안 칩셋이 필요하지 않습니다. 또한 다양한 3rd-party 벤더가 제공하는 PKCS#11 인터페이스를 지원하는 HSM/Secure elements 등의 하드웨어 보안 엔진들을 OpenSSL로 추상화해서 SDK나 agent에서 사용 가능합니다. PKCS#11? PKCS#11(공개 키 암호 표준 #11)은 키(RSA, 대칭 키, 타원 곡선 암호화), 인증서(X.509) 와 같은 암호화 객체 관리를 위한 API를 지정하는 표준으로써 PKCS#11은 물리적인 장치의 특성에 관계없이 애플리케이션과 암호화 장치 간의 표준 인터페이스를 제공합니다. 2.2 Dual Copy(A/B) 및 Delta 업데이트 지원 소프트웨어 업데이트 실패 시에 이전 상태로 복원이 빠르게 가능하도록 Dual copy(A/B)를 유지하는 방식을 지원합니다. 이 방식은 A라는 루트파일시스템이 booting 상태에서는 B라는 루트 파일시스템 또는 B라는 루트 파일시스템으로 booting 상태에서는 A라는 루트 파일 시스템 전체를 업데이트하는 방식으로, 업데이트 프로세스 중에 배포가 불완전하거나 손상된 경우에 장치를 수 초 안에 빠르게 복구할 수 있는 장점이 있습니다. 추가로 시스템 수준의 부트로더, 커널 및 각종 드라이버 루트 파일시스템 포함해서 신규로 업데이트되는 버전과 이전의 stable 버전 간의 바이너리 차이만 교체하는 Delta 업데이트를 지원합니다. 2.3 중앙에서 원격 업데이트 진행 상황 및 장치 상태 모니터링 웹 UI 또는 REST API를 사용하여 운영자가 장치 이름, 유형 및 제조 연도, 인증서 및 액세스 정책과 같은 장치 속성 관리가 가능하며, 단일 장치 또는 장치 그룹으로 구성해서 해당 그룹에 대한 계층 구조로 액세스 및 업데이트 배포 정책 설정해서 운영할 수 있습니다. 2.4 안전한 네트워크 통신을 위한 Secure Channel 지원 솔루션에 접속하는 모든 장치는 자체 구축된 PKI를 통해 발급된 자격 증명(X.509 인증서) 기반해서 디바이스 간에 주고받는 네트워크 프로토콜(MQTT, HTTPS) 트래픽을 장치와 서버와의 Mutual TLS 을 이용한 종단 간 암호화를 통해 안전하게 전송합니다. mTLS (mutual TLS)? mTLS는 서버와 클라이언트 간 상호 인증의 방법 중에 하나이며, 서버 클라이언트 모두 인증서가 있고 양쪽 모두 private key 쌍을 사용하여 인증합니다. 일반적인 TLS 와 비교하여 mTLS는 양 당사자를 확인하는 단계가 추가된 형태입니다. 2.5 Artifact 파일 서명 및 암복호화 지원 대상 장치에 전달된 업데이트가 신뢰할 수 있는 소스에서 온 것인지, 아니면 해커 혹은 악성코드에 의해 위변조 되지 않았는지 무결성을 확인할 수 있는 기능을 제공합니다. 빌드 서버에서 생성된 artifact 파일은 CLI 도구로 배포시 마다 private key와 public key가 신규로 만들어지고, 생성된 private key로 서명된 artifact 파일과 public key가 함께 서버에 업로드됩니다. 이후 OTA 업데이트 시 클라이언트는 서버에서 public key와 서명 값을 전달받고 다운로드 되는 이미지의 서명 체크를 통해 설치 대상 파일들의 위변조 여부를 확인할 수 있습니다. 이러한 서명 확인 절차를 통과하면 클라이언트는 해당 OTA 업데이트가 신뢰할 수 있는 소스에서 온 것으로 간주하고 다운로드 된 소프트웨어 설치를 진행합니다. 그리고 CBC 모드에서 AES 블록 암호를 사용하여 artifact 파일을 대칭적으로 암호화된 이미지로 배포해서 Artifact 위변조 공격을 방어하는 기능을 지원합니다. 2.6 Chain of Trust 기반의 Secure Booting Secure boot는 De-face 공격(펌웨어 및 구동 페이지 변조로, 해킹 당한 표시 및 오작동을 일으키는 방식), 소프트웨어 업데이트 및 펌웨어 변조 공격 등에 대한 효과적인 대비 방법으로 CPU -> Bootloader -> Kernel -> Root FileSystem(RootFS)의 순서로 각각의 시그니처 & 무결성 정보를 확인하고, 설치된 이미지에 변조가 없다면 정상적으로 부팅이 완료 되게 하는 기술입니다. 위 단계별로 동일하게 신뢰점(개별 시스템 이미지를 읽어, 해시 함수를 통해 메시지 다이제스트 생성, 개별 검증 프로그램으로 시그니처를 검증하는 방식) 과정을 통해 순차적으로 수행합니다. ・ ・ ・ 이 글이 자율주행 제어 장치뿐만 아니라 다양한 임베디드 장치의 OTA 업데이트 구현을 시작하는 기업과 제품 개발자들에게 작은 도움이 되면 좋겠습니다. 우리는 임베디드 장치 관련 소프트웨어 개발 업체들의 제품 프로젝트에 매우 적은 노력과 낮은 비용으로 안정적이고 안전한 OTA 업데이트 기능과 위에서 소개한 보안 기능들을 통합 적용해서 빠른 제품 출시에 실질적인 도움을 줄 수 있는 SaaS(Software as a Service) 클라우드 기반으로 서비스 제공을 준비하고 있습니다. 관련해서 보다 자세한 기술 및 기능 설명이나 demo 버전 사용을 원하시면 언제든지 42dot으로 문의 부탁드립니다. 김성준 | SDV Security (Tech Lead) 스스로 움직이는 모든 장치들에 적용될 보안 기술을 개발 하고 있습니다.

News

Gleo AI icon
2026.07.15

포티투닷, “사람처럼 자연스러운 대화” 가능한 차량용 음성 AI 에이전트 ‘글레오 AI’ 기술 공개

포티투닷, “사람처럼 자연스러운 대화” 가능한 차량용 음성 AI 에이전트 ‘글레오 AI’ 기술 공개 - 대화 맥락, 주행 상황 등 고려해 사용자 의도 종합적 이해…정보 제공 및 차량 직접 제어 - 목적에 따라 LLM 선택적 활용되는 구조로 유연성 및 성능 확보…’인지-판단-실행’ 전 과정 수행 - 자체 개발 ‘가드레일 에이전트’ 적용 및 무선 업데이트로 품질 지속 개선…”개인화 AI로 발전시킬 것” [2026년 5월 21일] 포티투닷(42dot)이 사람처럼 자연스러운 대화가 가능한 대규모 언어 모델(LLM) 기반의 차량용 음성 AI 에이전트 ‘글레오 AI(Gleo AI)’ 개발을 완료하고 관련 기술을 21일 공개했다. 글레오 AI는 현대자동차그룹의 글로벌 소프트웨어 센터인 포티투닷이 지난 2024년 개발에 착수해 이달 현대자동차 ‘더 뉴 그랜저’를 통해 처음 선보인 차량용 음성 AI 에이전트다. 대규모 언어 모델을 기반으로 차량에 동승한 사람과 대화하듯 자연스러운 의사소통이 가능하며, 사용자 요청에 따라 정보를 제공하거나 여러 가지 기능을 직접 제어한다. 모빌리티 AI의 새 지평을 열겠다는 의지를 담아 개발된 글레오 AI는 단순히 명령을 수행하는 것을 넘어, 차량 환경에 최적화된 음성 기술을 바탕으로 발화자의 위치를 인식하고, 대화 맥락과 주행 상황 등을 고려해 사용자의 의도를 종합적으로 이해한다. 이후 의도를 처리하기 위해 가장 적합한 에이전트를 선택 및 조합해 기능을 실행하고, 사람처럼 자연스러운 응답까지 생성한다. 글레오 AI는 차량용 기술로 개발된 음성 AI 에이전트로, 말로 하는 명령만으로 내비게이션 목적지 설정부터 공조 제어, 차량 기능 조작 등 다양한 기능을 차량 내 안전한 환경에서 제어 가능하다. 이를 통해 운전자 및 탑승객은 별도의 버튼 및 터치 조작 없이도 차량과 끊임없는 상호작용을 하며 즐겁고 편리한 이동 경험이 가능하게 된다. 글레오 AI의 구조는 이해, 판단, 답변 생성 등 단계별 목적에 따라 다양한 LLM이 선택적으로 활용될 수 있도록 설계돼 성능과 유연성을 동시에 확보했다. 또한 글레오 AI는 ▲LLM 인텔리전스(LLM Intelligence) ▲하이브리드 AI 아키텍처(Hybrid AI Architecture) ▲스피치 인텔리전스(Speech Intelligence) ▲글레오 인터페이스(Gleo Interface) 등 기술적 특징을 바탕으로, 차량 환경에 특화된 ‘인지-판단-실행’ 전 과정을 유기적으로 수행한다. 더불어 고객 경험 신뢰도 강화를 위해 포티투닷이 자체 개발한 ‘가드레일 에이전트’가 적용됐으며, 향후 무선 업데이트(OTA)를 통해 글레오 AI의 기능과 품질을 지속적으로 개선해 나갈 방침이다. 포티투닷 박민우 대표는 “글레오 AI는 ‘나의 수고를 덜어주는 이동 동반자’로서, 앞으로 더 많은 기능을 자연스럽게 수행하고 맥락을 이해하도록 고도화될 것”이라며, “중장기적으로는 사용자 행동과 선호를 이해해 말하지 않아도 필요한 것을 돕는 개인화 AI로 발전시킬 것”이라고 밝혔다. ■ ‘인지-판단-실행’에 최적화된 기술 적용 글레오 AI의 LLM은 대화 맥락과 발화 의도를 이해해 에이전트의 과업을 추론 및 배분하며, 사용자 의도에 기반해 최종적인 실행 정보와 사용자 응답 문장을 생성하는 핵심 역할을 수행한다. 또한 하이브리드 아키텍처를 채택해 저지연성과 안정성이 필수적인 차량 및 시스템 작업은 온디바이스에서 처리하고, 고성능 연산이 필요한 작업은 클라우드에서 수행하도록 설계됐다. 또한 최신 LLM 기반의 TTS(Text-To-Speech) 기술을 통해 고도로 자연스러운 음성을 생성하며, 초저지연 응답 속도를 구현해 끊김 없는 대화를 지원한다. 이러한 음성 기능은 글레오 인터페이스 생태계 내에서 기본 시스템 앱뿐 만 아니라 외부 서드파티(3rd Party) 앱도 쉽게 연동하고 확장할 수 있게 한다. ■ ‘진짜 사람처럼’ 소통하는 AI 시스템 적용 및 엄격한 신뢰성 구축 글레오 AI만의 차별점은 차량 환경에 특화된 인지-판단-실행 구조의 에이전트 프레임워크가 진짜 사람 같은 AI 시스템으로 구현됐다는 것이다. 기존의 일반적인 AI 음성 비서가 정해진 단순 명령어 기반으로만 작동해 사람의 부가적인 개입이 필요한 불편함이 존재했다면, 글레오 AI는 사용자의 발화를 맥락 기반으로 이해하고 의도를 판단하기 때문에 정확한 명령어를 알지 못해도 자연스럽게 수행할 수 있으며, 이전 대화와 상황까지 연속적으로 이해해 사용자의 편의성을 극대화한다. 단순히 정보를 제공하는 데 그치지 않고 차량 기능과 앱을 직접 제어해 내비게이션, 공조, 미디어, 차량 설정 등 다양한 기능을 하나의 대화 흐름 안에서 수행할 수 있다. 발화자의 좌석 위치나 차량 상태에 따라 다른 작업을 수행하는 것도 가능하다. 또한 포티투닷은 글레오 AI를 통해 정확하고 최신의 외부 정보까지도 제공하기 위해 지식 에이전트(Knowledge Agent)를 구축했다. 웹 검색, 자체 데이터 컬렉션 등을 기반으로 관련 정보를 실시간으로 탐색하고, 이를 요약 및 재구성하는 등 사전에 학습하지 않은 최신 정보까지도 활용해 사용자에게 보다 풍부한 답변을 제공한다. 뿐만 아니라 포티투닷은 차량 환경에 최적화된 음성 및 인터랙션 기술을 글레오 AI에 내재화했다. 글레오 AI에 적용된 음성 전처리 기술, 언어별 음성 인식, 자연스러운 음성 합성은 포티투닷이 자체 개발한 것으로, 복합적인 변수가 존재하는 차량 환경에서도 안정적인 음성 품질을 제공한다. 차량 내 인터랙션 데이터는 개인정보와 주행 맥락이 결합돼 있어 엄격한 통제가 필수적이다. 글레오 AI는 독자 기술로 개발돼 데이터의 수집부터 저장, 활용까지 전 과정의 거버넌스를 보장한다. 가드레일 에이전트를 통해 위험 발화를 사전에 감지하며, 법규 위반이나 부적절한 요청은 응답을 제한해 시스템의 신뢰성과 윤리성을 확보했다. 특히 차량 제어 요청은 안전 상황을 확인한 뒤 동작하도록 구조화해 안정성을 높였다. ■ 사용자 피드백을 반영한 지속적 기술 고도화 글레오 AI의 기능과 품질은 OTA를 통해 지속적으로 개선될 예정이다. 포티투닷은 실제 주행 데이터와 고객 피드백(VOC)을 서비스에 즉각 반영하는 체계를 구축하는 것을 포함해, ▲자체 LLM 비중 확대 ▲온디바이스 AI 적용 확대 ▲개인화 및 추천 기능 고도화 ▲다양한 서비스 및 앱과의 연동 확대 추진 등을 통해 향후 개인화 AI로 발전시킬 계획이다.